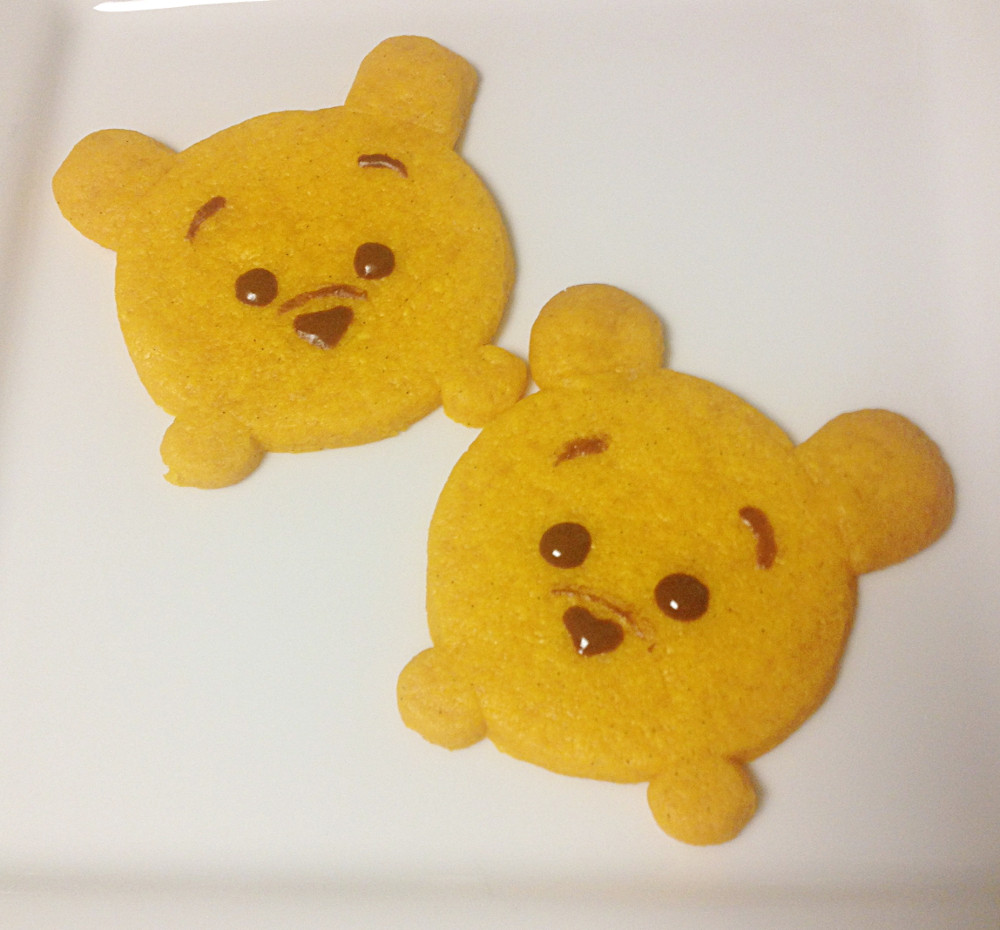
I’ve been considering Tsum cookies for a while now. All I knew was I wanted a cookie with minimal glaze. I think it’s really hard to do a glaze that looks glossy and beautiful, but doesn’t effect the flavor of the cookie underneath negatively. Since a lot of Tsums are one color anyway, I knew that’d be easy enough.
I polled some friends on which Tsum they thought was cutest. My friend Amanda nominated Pooh, and suggested a honey cookie. I know a brilliant idea when I hear it. I was so excited I whipped them up at right after we spoke, even though it was 9PM and I really shouldn’t have been starting new projects.
Shortbread
2 1/4 cups (250g) all purpose flour
2/3 cups (75g) powdered sugar
1 vanilla bean, scraped
1 tsp. salt
3/4 cups (180g) butter, cold and cubed
3 tbsp (45ml) honey
Yellow and orange food coloring (preferably gel, but liquid is okay)
Glaze
3 tbsp (20g) sifted powdered sugar
1/2 tbsp (4g) sifted cocoa
1 tbsp milk
1. Preheat your oven to 325 F. Line two baking sheets with a silicone mat or parchment paper. Put the flour, salt and sugar into the food processor and pulse to combine. Add butter and vanilla bean, and pulse until the butter and flour form course crumbs. If you don’t have a food processor, use a pastry cutter or rub together with your fingers until you get the same course crumb texture.
2. Add the honey and food coloring. Start off with a small amount of color, a few drops at a time. I started with about 6 drops of yellow and 2 of orange. Pulse the dough gradually, adding more color if necessary. Once you’ve got the right color, pulse the dough until it’s just combined. Turn it onto a floured surface and give it a quick knead to make sure there are no streaks, then flatten it into a disk and chill the dough for about half an hour.
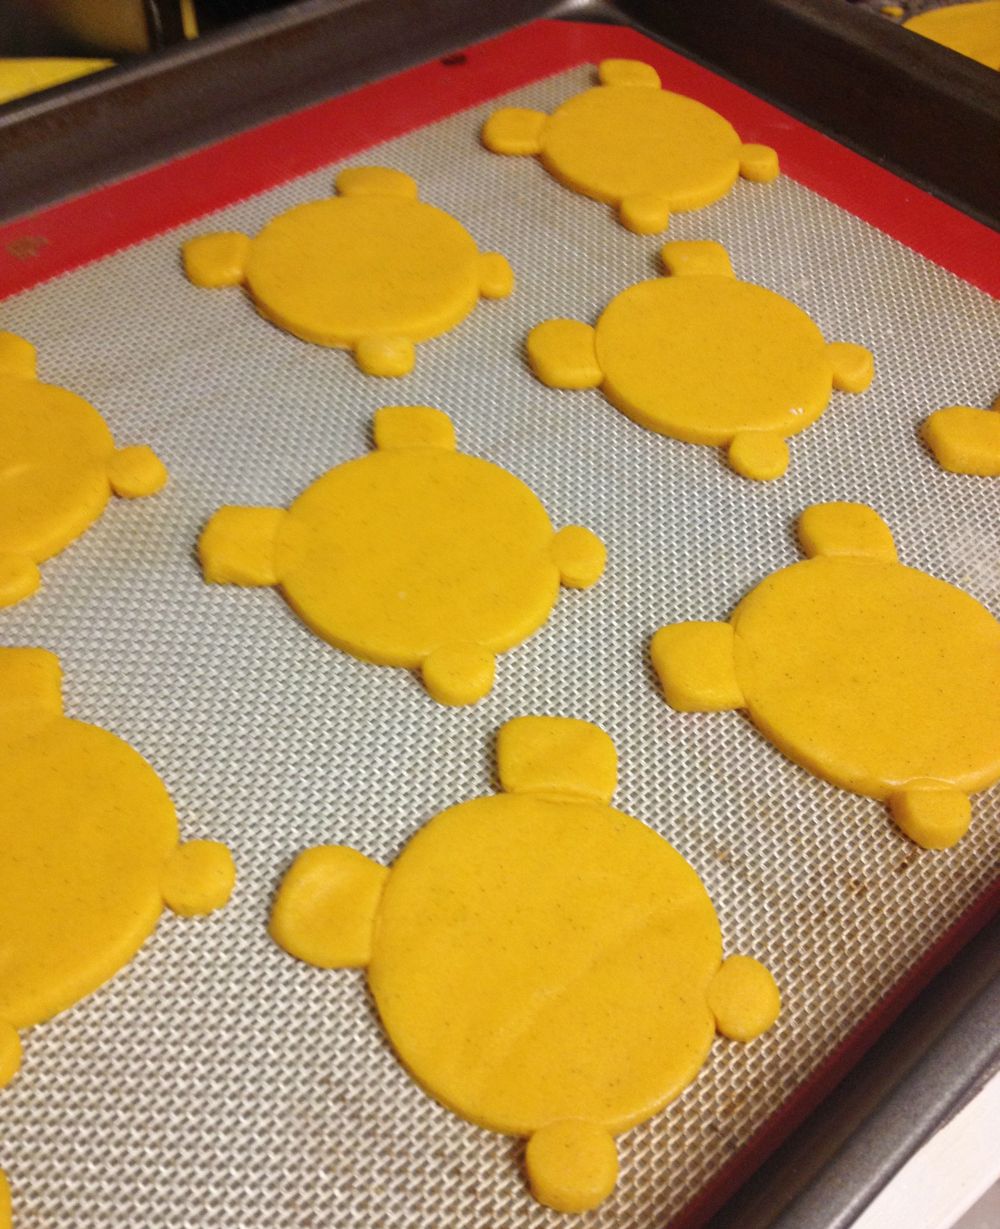
3. Once the dough is chilled, roll it out on a floured surface to 1/4″-1/3″ thickness. Using a 2″ round cutter, punch out 20 rounds and place them your baking sheets.
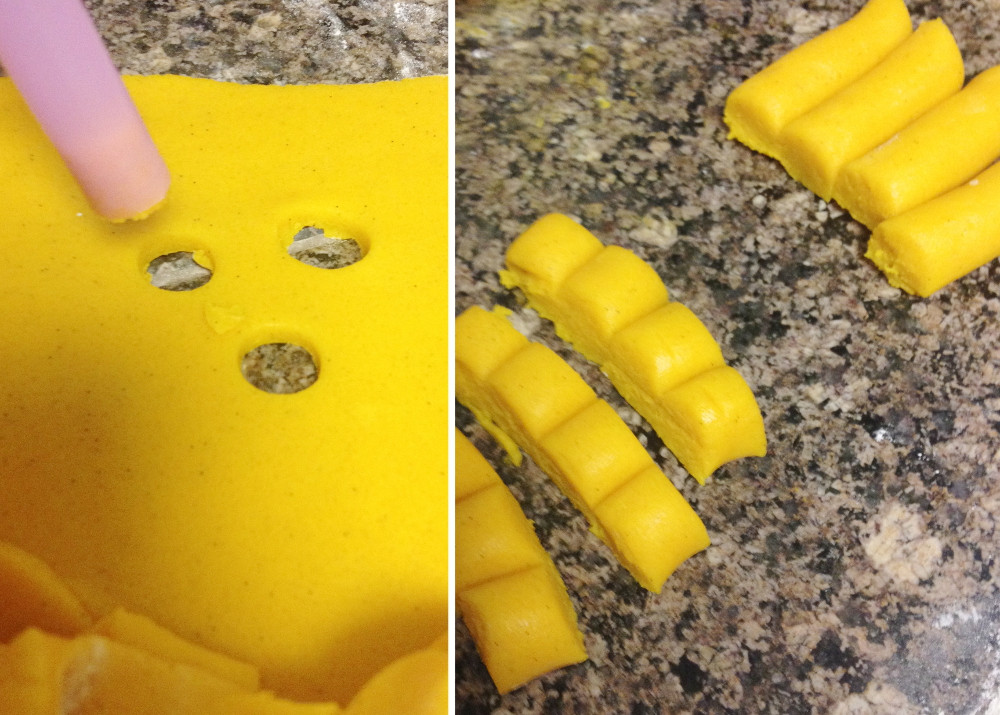
4. Make the ears and feet. Use bubble tea straw or small round cutter to punch out the feet. For the ears, weigh out 85g of your dough. Roll it into a long log, and use a knife to split it into 40 even pieces. Place the legs and ears on your rounds, gently pressing them against the rounds. You want the pieces of dough to make enough contact to stay on after baking. Use your straw (or a small rolling pin) to very gently roll over your completed Pooh shapes, ensuring they have the same height. Then, using your 2″ cutter, gently make indentations where the ears and feet meet the body. You want the body to be a defined circle. Do not cut through far enough to split.
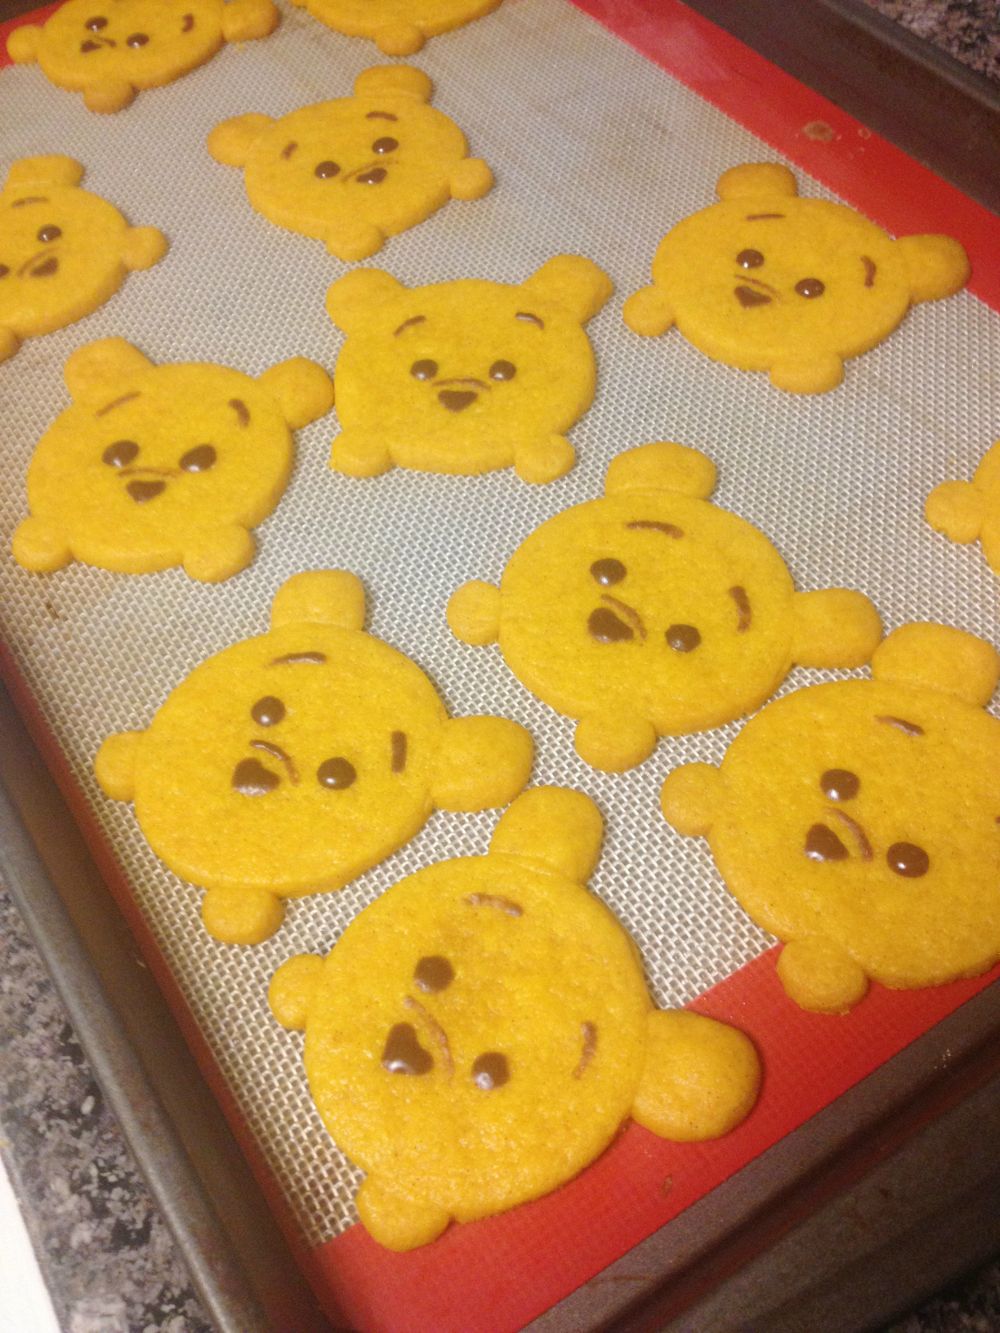
5. Bake for 12 minutes, spinning your pan around once at the 8 minute mark to ensure even baking. The cookies will be done when the edges are very lightly browned. Remove from the oven and allow to cool completely.
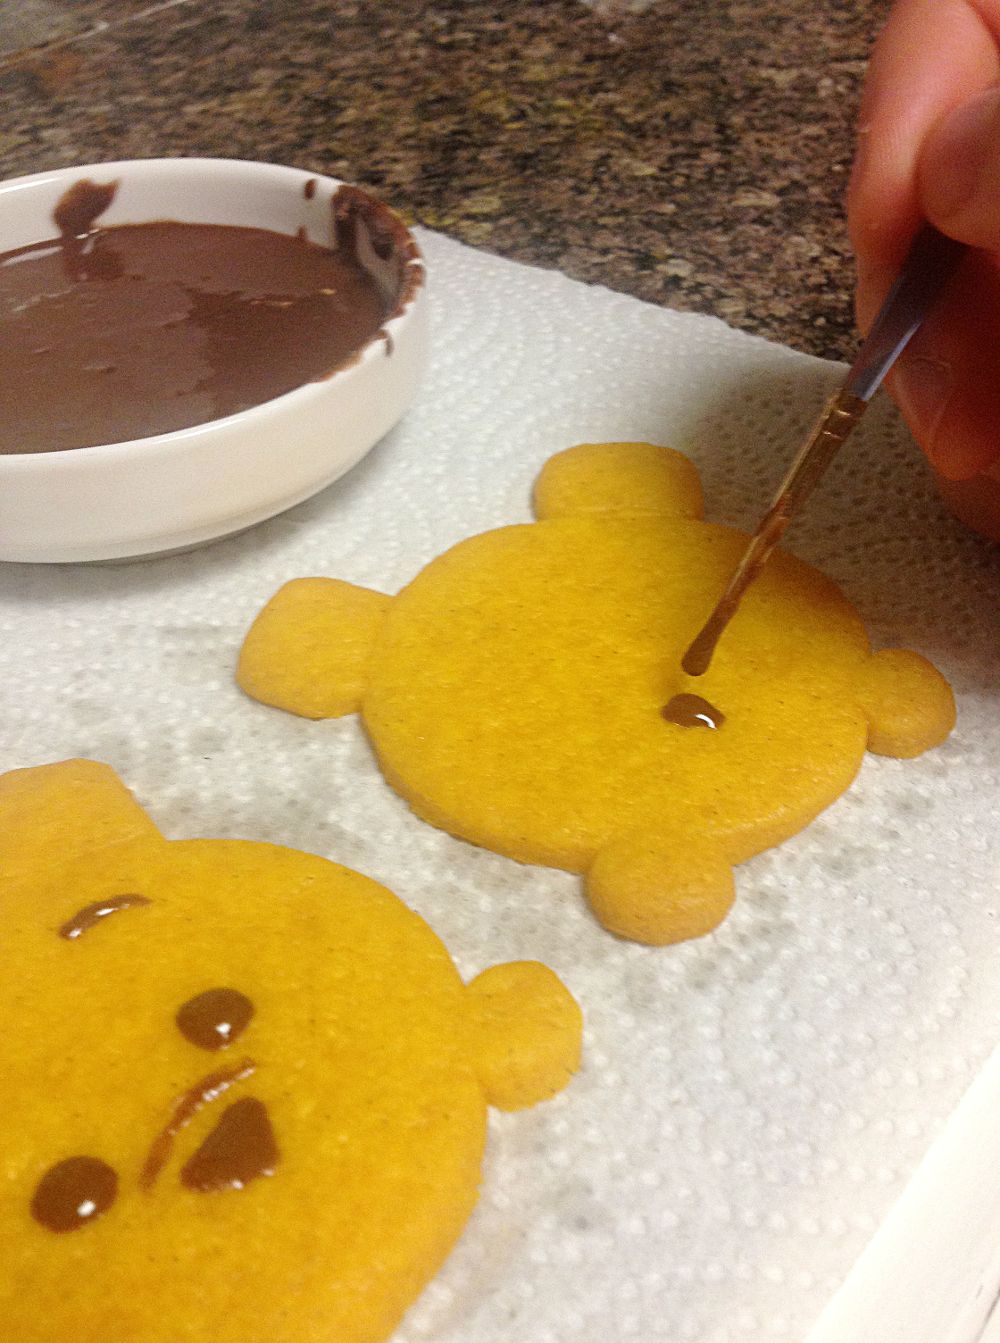
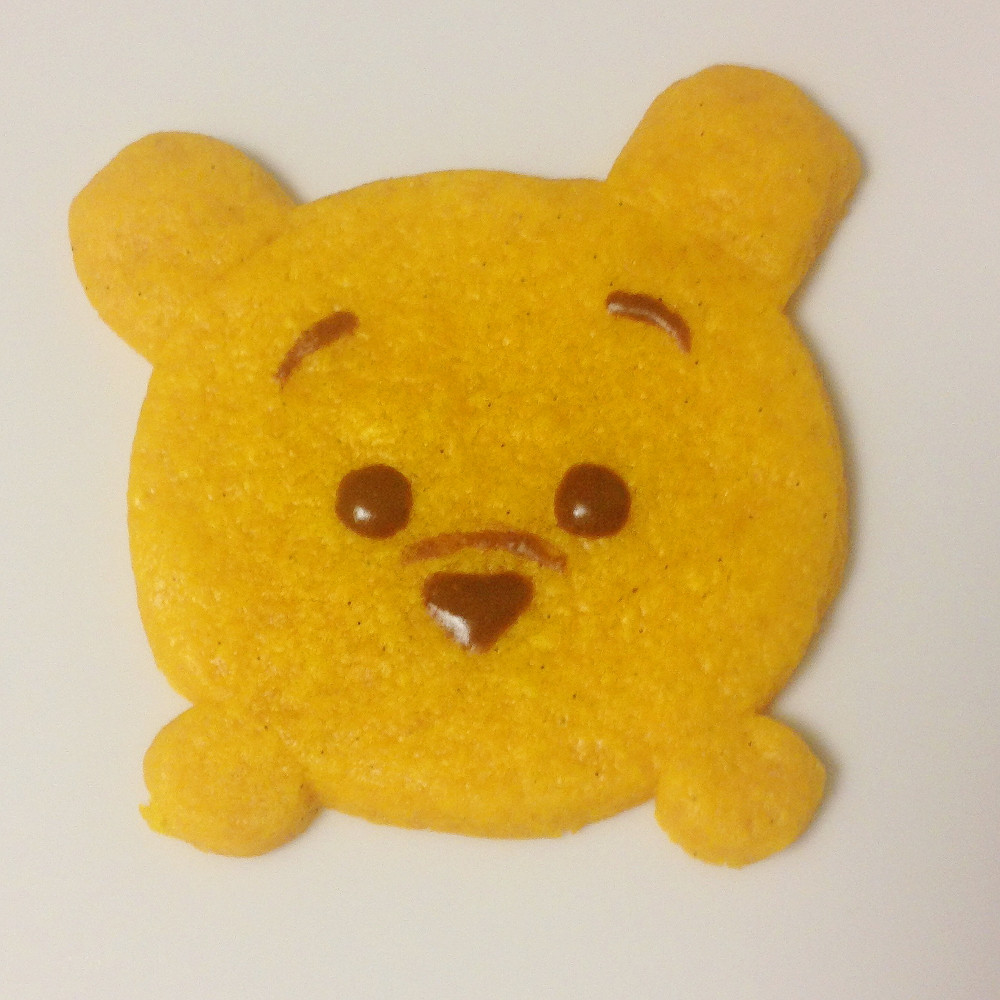
6. Mix your glaze in a small bowl, ensuring there are no lumps. Then, use a small brush to paint Pooh’s face onto the cookies with it. Allow the glaze to dry, then enjoy!

I like it its cute!!!!!!!!!
Thanks!